Step-by-Step Guide: Setting Up WordPress with Nginx on Ubuntu 24.04 (LTS)
1. Create and Secure a Virtual Private Server
2. Install Nginx PHP 8.3 WP-CLI MySQL
3. Setting Up WordPress with SSL on Nginx
4. Set Up Free SSL/TLS with Cloudflare to Nginx (Skip this if you using Certbot in Step 3)
(Current Step) 5. Set Up Redis Object Cache and Nginx FastCGI Page Cache
We secured your server and set up your first WordPress site in the last chapter. Now, let’s make it fly! Caching helps your site handle more visitors and deliver pages faster, improving the user experience. This chapter dives into backend caching for WordPress.
1. Let’s install an object cache to boost your WordPress site’s speed
Imagine a special box that remembers your website’s database answers. Instead of constantly asking the database, your site can use this cache for faster loading times.
For object caching, Redis is a popular open-source choice, but Memcache and Memcached are also options.
- Install the recommended Redis version to optimize caching.
curl -fsSL https://packages.redis.io/gpg | sudo gpg --dearmor -o /usr/share/keyrings/redis-archive-keyring.gpg
echo "deb [signed-by=/usr/share/keyrings/redis-archive-keyring.gpg] https://packages.redis.io/deb $(lsb_release -cs) main" | sudo tee /etc/apt/sources.list.d/redis.list
sudo apt update- Run these commands to install Redis and ensure smooth operation:
sudo apt install redis-server -y
sudo service php8.3-fpm restart- Let’s set Redis to start automatically on reboot.
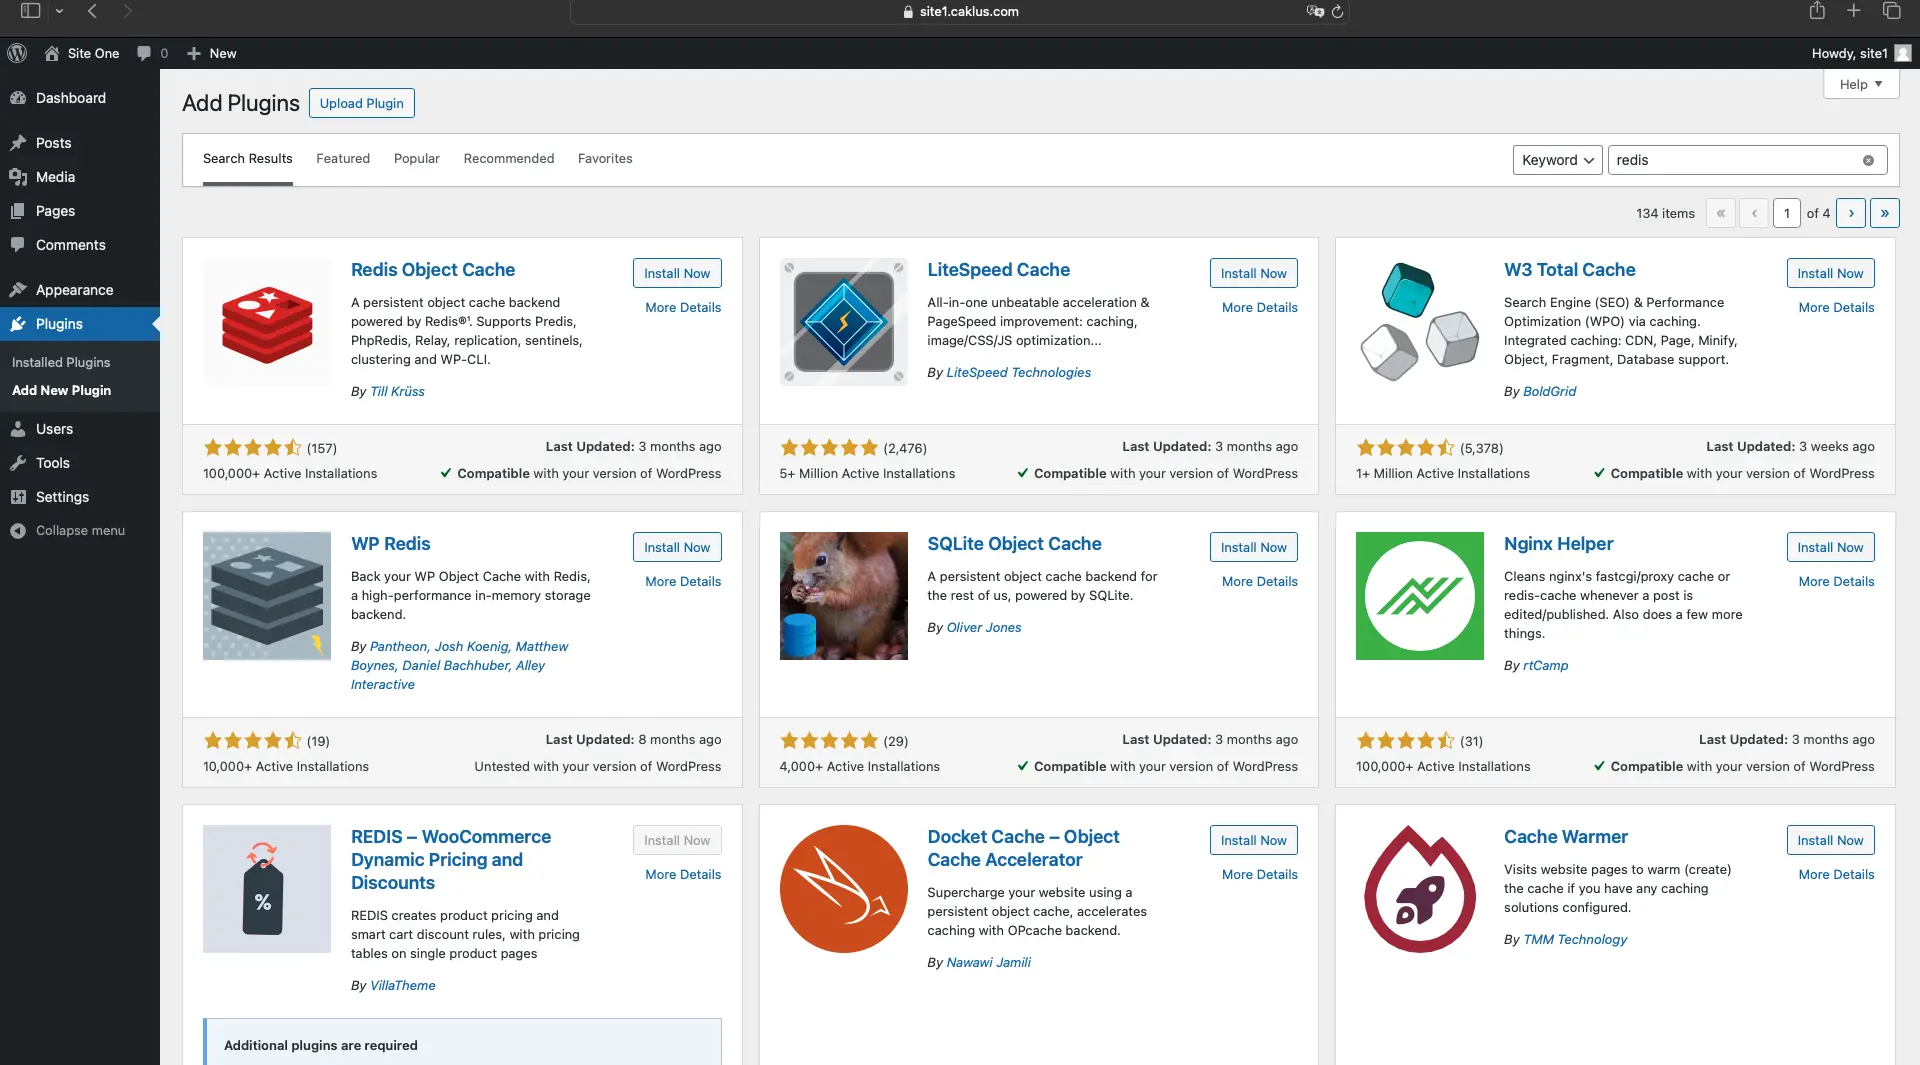
sudo systemctl enable redis-server- While Nginx can use Redis for basic caching, WordPress needs a dedicated plugin. We recommend Redis Object Cache by Till Krüss for this role.

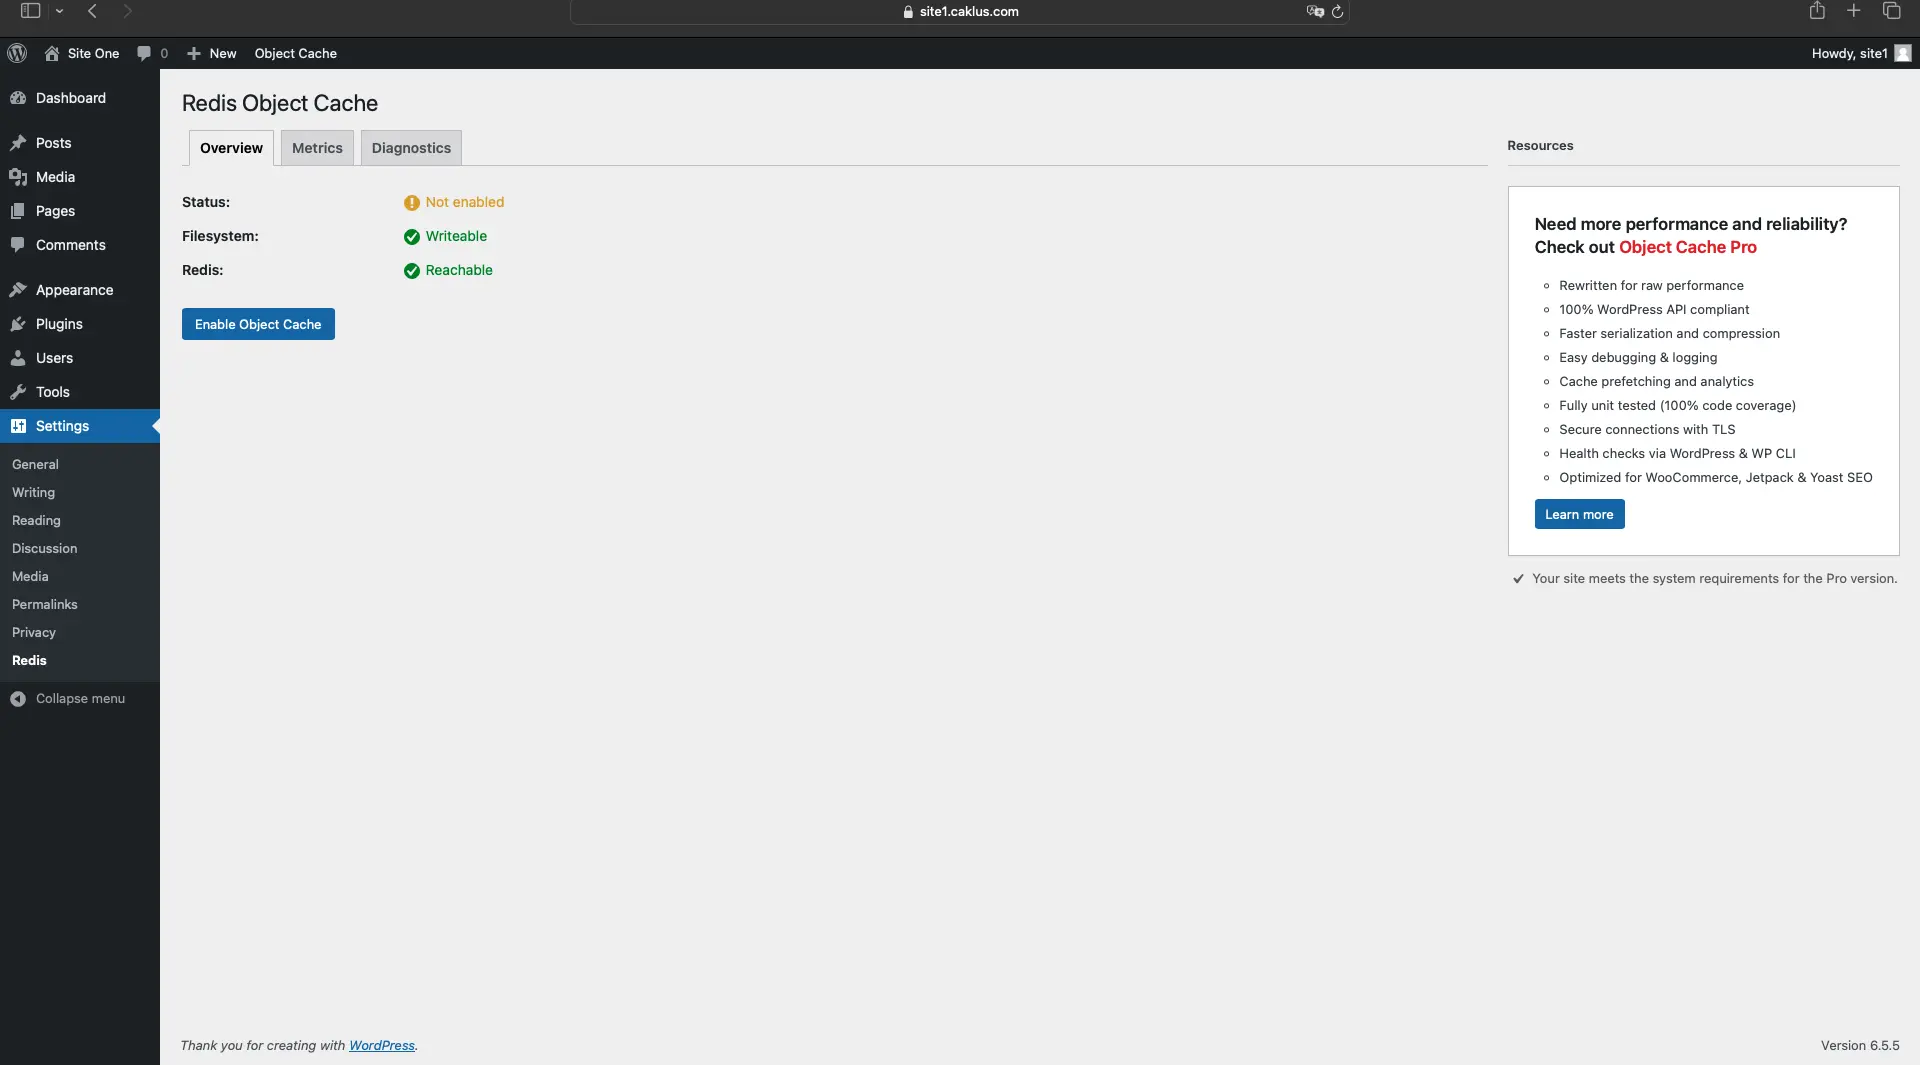
- After activating the plugin, head to Settings > Redis.

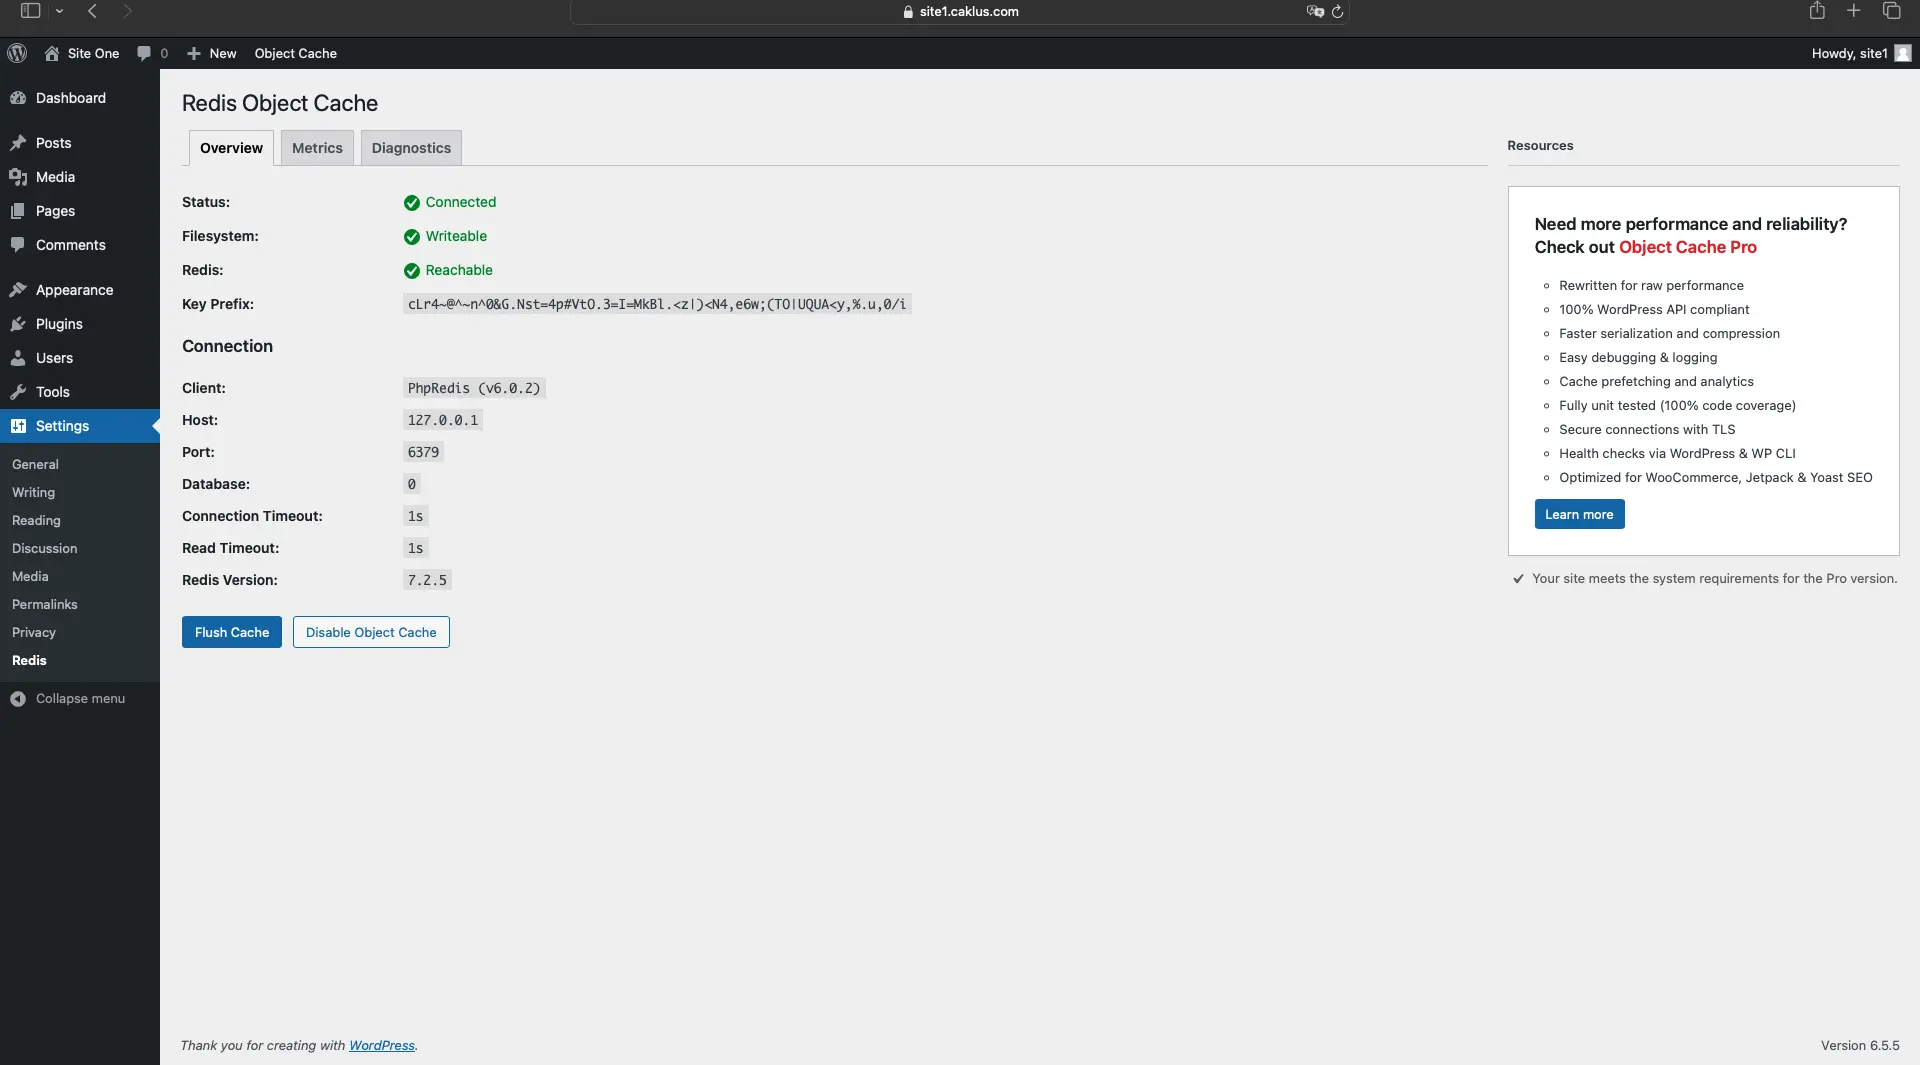
- Click the Enable Object Cache button.

This settings page also allows you to manually clear the cache, if necessary.
While object caching helps (reducing front-page queries from 22 to 2), every page request still connects to the database. Object caching truly shines with query times. They dropped from a sluggish 2.1ms to a speedy 0.3ms, measured by Query Monitor.
2. Let’s enable page caching to optimize website performance
Object caching already made a big difference, but we can do even better. Most websites rarely update their content. Why rebuild the entire page with PHP and database queries every time? Let’s serve pre-rendered static HTML versions for lightning-fast loading times with page caching.
Nginx FastCGI cache takes things a step further. It creates super-fast static versions of your website’s pages, so visitors get them instantly without needing PHP or the database.
- To activate page caching, we’ll make some adjustments to your existing Nginx server block configuration.
sudo nano /etc/nginx/sites-available/site1.caklus.com- Before your server block, add this line, customizing the fastcgi_cache_path and keys_zone directives. Remember to choose a suitable location for your cache.
fastcgi_cache_path /home/newuser/site1.caklus.com/cache levels=1:2
keys_zone=site1.caklus.com:100m inactive=60m;- While page caching is great for speeding up your site, some pages should be excluded. Here’s a configuration snippet to prevent caching of admin screens, logged-in user pages, and other dynamic content. Place this code above your first location block in the Nginx configuration file.
set $skip_cache 0;

# POST requests should always go to PHP
if ($request_method = POST) {
    set $skip_cache 1;
}

# URLs containing query strings should always go to PHP
if ($query_string != "") {
    set $skip_cache 1;
}

# Don't cache uris containing the following segments
if ($request_uri ~* "/wp-admin/|/wp-json/|/xmlrpc.php|wp-.*.php|/feed/|index.php|sitemap(_index)?.xml") {
    set $skip_cache 1;
}

# Don't use the cache for logged in users or recent commenters
if ($http_cookie ~* "comment_author|wordpress_[a-f0-9]+|wp-postpass|wordpress_no_cache|wordpress_logged_in") {
    set $skip_cache 1;
}- Now, let’s update the section in your Nginx configuration that processes PHP requests (often the second block) with these instructions:
fastcgi_cache site1.caklus.com;
fastcgi_cache_bypass $skip_cache;
fastcgi_no_cache $skip_cache;
fastcgi_cache_valid 60m;
Remember the fastcgi_cache setting we added earlier? It links to the keys_zone we defined before. You can also control how long pages are cached by changing the 60m value to your desired minutes. 60 minutes is a good starting point.
Play with the cache duration (currently 60 minutes)? Remember to adjust the inactive parameter in the fastcgi_cache_path line as well! This ensures inactive cached data gets removed after the same amount of time to keep things fresh.
Hit CTRL + X followed by Y to save the changes.
- Let’s edit your Nginx configuration file now.
sudo nano /etc/nginx/nginx.conf- Insert these lines below the section that controls gzip compression in your Nginx configuration
##
# Cache Settings
##

fastcgi_cache_key "$scheme$request_method$http_host$request_uri";
add_header Fastcgi-Cache $upstream_cache_status;- Nginx’s cache settings define how to name cached pages and identify cache hits with a special response header. Hit CTRL + X followed by Y to save the changes. Now restart Nginx:
sudo service nginx restart- A new header in the response should now indicate if content is served from the cache.

Here’s what the new header might tell you:
- HIT: Great news! The page is served from the cache, making it super fast.
- MISS: The page wasn’t cached yet, but refreshing will likely trigger caching.
- BYPASS: The page is cached, but not shown because it’s an admin screen or you’re logged in.
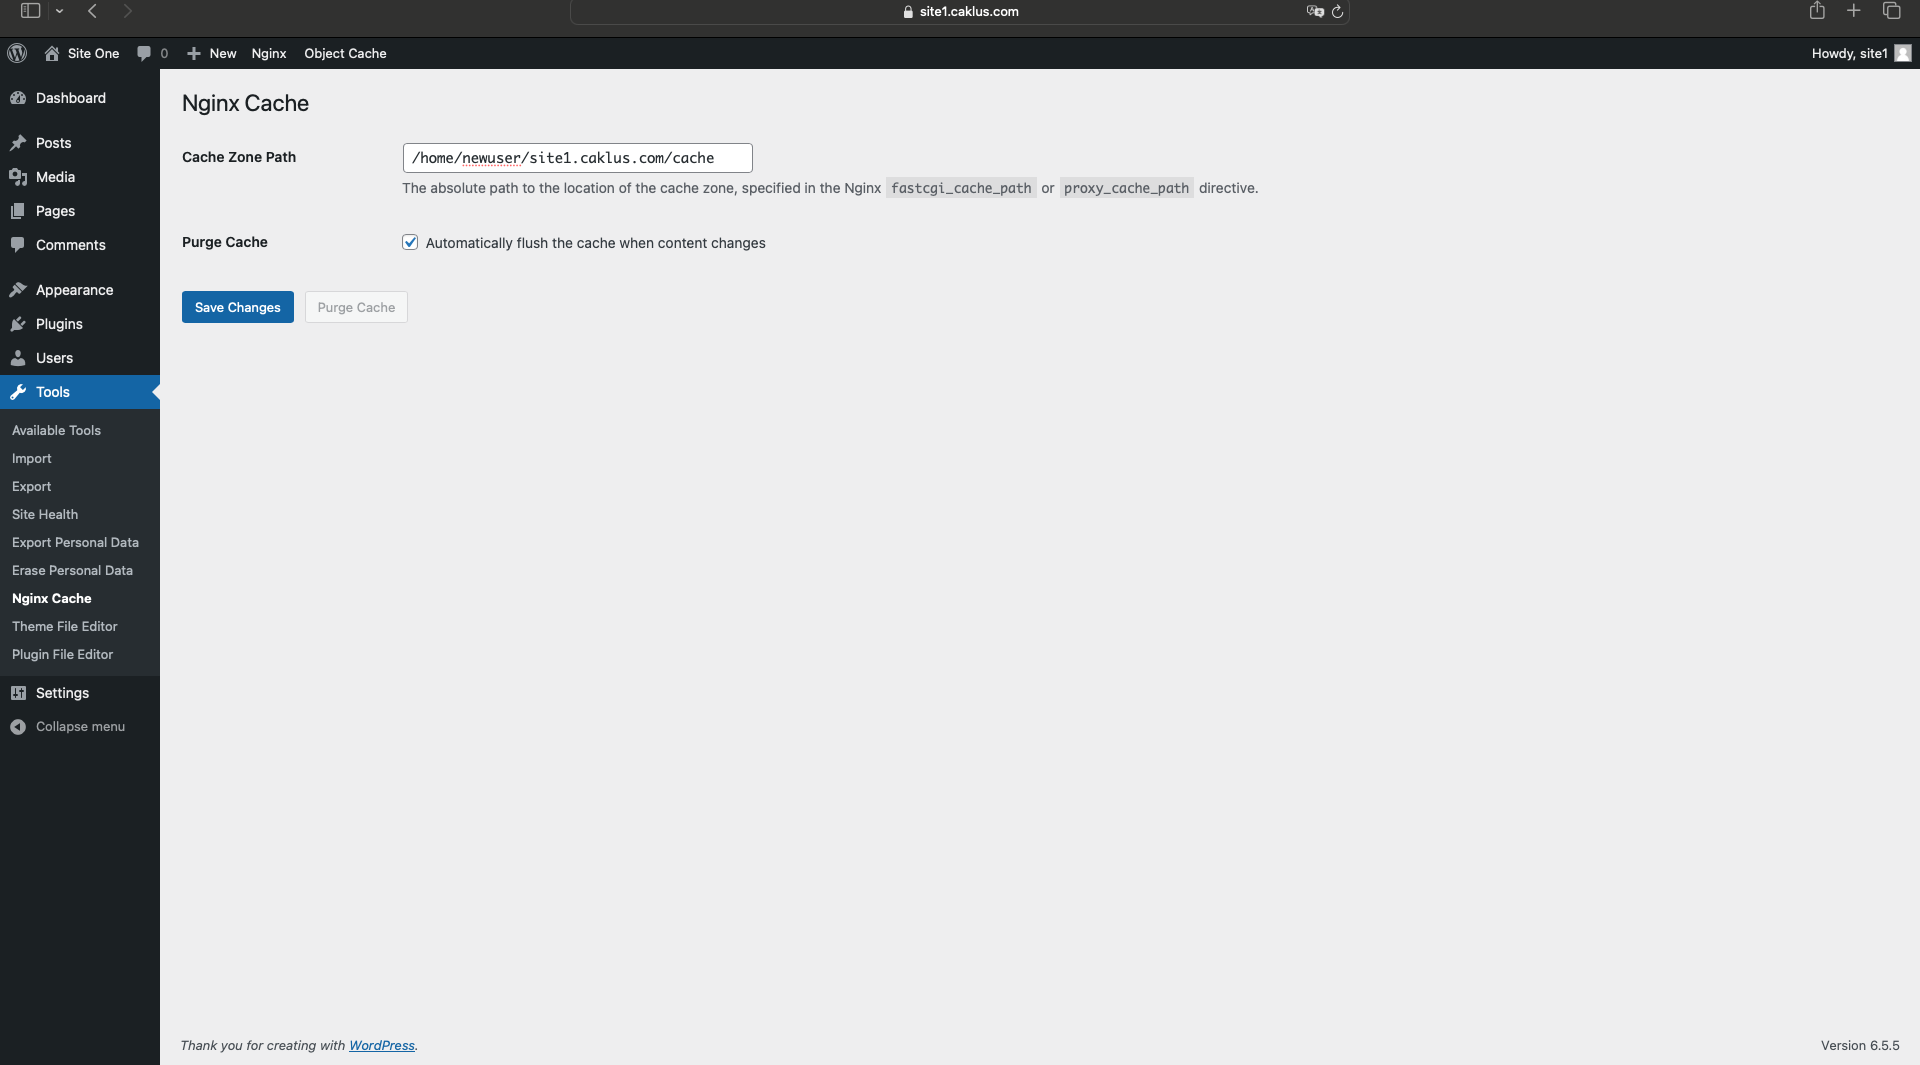
For even smarter caching, install the Nginx Cache plugin by Till Krüss. It automatically clears the cache whenever your WordPress content changes, keeping things fresh. You can also manually purge the entire cache from your WordPress dashboard.
You can also purge the entire cache by SSH’ing into your server and removing all the files in the cache folder:
sudo rm -Rf /home/abe/site1.caklus.com/cache/*This is particularly useful when you can’t access your WordPress dashboard, such as when a redirect loop is stuck in the cache.
- After installing the plugin, go to Tools and find Nginx Cache. There, enter the same storage location you used for the fastcgi_cache_path setting in your Nginx configuration file.

3. Optimizing WooCommerce Performance with Cache Rules
While caching helps your website load faster, it’s important to be selective on what you cache for WooCommerce stores. This is because features like shopping carts, checkout, and account pages are unique to each customer. Imagine someone seeing someone else’s cart items, not ideal.
You can fine-tune what gets cached with even more specific rules. These rules can be based on different conditions and can use something called regular expressions (don’t worry, they sound scarier than they are). The following example works for the basic shopping cart, checkout, and account pages that WooCommerce creates by default:
# Don’t use cache for WooCommerce pages
if ($request_uri ~* "/(cart|checkout|my-account)/*$") {
    set $skip_cache 1;
}
Another good idea is to skip caching the cart so customers never accidentally see someone else’s stuff.
# Don't use the cache when cart contains items
if ($http_cookie ~* "woocommerce_items_in_cart") {
    set $skip_cache 1;
}- Open the Nginx configuration file for your site
sudo nano /etc/nginx/sites-available/site1.caklus.com- Once you’ve added the exclusions, save the configuration file (press CTRL+X, then Y). Finally, it’s important to test the configuration to ensure there are no errors.
sudo nginx -t- Once you’ve confirmed there are no errors, apply the changes to your website’s caching.
sudo service nginx reloadAfter making these changes, if you visit any WooCommerce page or have items in your cart, you shouldn’t see anything related to other customers. This is because those pages will no longer be stored in the cache.
While WooCommerce is a popular example, other plugins can also create pages that shouldn’t be cached. This includes Easy Digital Downloads, WP eCommerce, BuddyPress, and bbPress. To ensure these pages work properly, you might need to adjust your caching settings. Luckily, most plugins have documentation that explains how to exclude their pages from the cache.
That’s it for this tutorial, I hope this tutorial helped you improve your website’s performance. If you have any questions, feel free to consult the documentation or search online forums.


