Step-by-Step Guide: Setting Up WordPress with Nginx on Ubuntu 24.04 (LTS)
1. Create and Secure a Virtual Private Server
2. Install Nginx PHP 8.3 WP-CLI MySQL
(Current Step) 3. Setting Up WordPress with SSL on Nginx
4. Set Up Free SSL/TLS with Cloudflare to Nginx (Skip this if you using Certbot in Step 3)
5. Set Up Redis Object Cache and Nginx FastCGI Page Cache
We built the server base in the last chapter, now let’s deploy your first secure WordPress site with HTTP/2 speed!
HTTPS
HTTPS is like a vault for your online conversations. It encrypts the data you send to websites, locking it away from prying eyes and ensuring only the intended recipient can access it. Unlike plain HTTP, which is like sending postcards, HTTPS keeps your information confidential.
While HTTPS is essential for protecting credit card details, it’s become standard for almost all websites. Even Google rewards secure sites with better search ranking.
1. Pick a web address (domain) and set it up (DNS)
- Just like we gave our server a name in the First Chapter, we’ll now do the same for our website by setting up its DNS.
- I claimed my website name, site1.caklus.com, and set it up in my DNS. This lets visitors reach my site at both globex.turnipjuice.media and www.site1.caklus.com.

- Using CNAME records here is smart! If our server’s IP address ever changes, we only need to update one record.
2. Get a security certificate (SSL) for your website
- Grab a free Let’s Encrypt certificate with the helpful Certbot tool.
sudo apt install software-properties-common
sudo add-apt-repository universe
sudo apt update
sudo apt install certbot python3-certbot-nginx- Using the Nginx Certbot plugin, run this command to get a free certificate for multiple domains (up to 100) – just add more d flags for each extra domain.
sudo certbot --nginx certonly -d site1.caklus.com -d www.site1.caklus.com- Certbot will create your certificate after email and terms confirmation, remember the location of fullchain.pem and privkey.pem for later.
Successfully received certificate.
Certificate is saved at: /etc/letsencrypt/live/site1.caklus.com/fullchain.pem
Key is saved at:         /etc/letsencrypt/live/site1.caklus.com/privkey.pem
This certificate expires on 2024-10-08.
These files will be updated when the certificate renews.
Certbot has set up a scheduled task to automatically renew this certificate in the background.- Certbot auto-renews certificates, but test it with this command.
sudo certbot renew --dry-run3. Configure Nginx to host your website
Since our server ignores unknown websites, let’s create a special instruction (server block) for Nginx to handle traffic for our new domain(s).
- We used
/var/www/htmlfor our initial setup, but let’s switch to a better organized folder for WordPress. - Ensure you’re currently in your home directory
cd ~/- We’ll start by crafting the folders and setting permissions for your WordPress site. Nginx logs go in the
logsfolder, while the public website lives in thepublicdirectory.
mkdir -p site1.caklus.com/logs site1.caklus.com/public
chmod -R 755 site1.caklus.com- We’ll manage your websites within your home directory, using this structure for easy organization:
newuser@tutorial:~$ ls -l ~/site1.caklus.com
total 8
drwxr-xr-x 2 newuser newuser 4096 Jul 10 15:38 logs
drwxr-xr-x 2 newuser newuser 4096 Jul 10 15:38 public- Now that the folders are set up, let’s create the Nginx server block (navigate to sites-available).
cd /etc/nginx/sites-available- For easier server management, name your new site configuration file the same as your website’s root directory.
sudo nano site1.caklus.com- Paste this configuration, replacing highlighted text with your details: server_name, access_log, error_log, root, fullchain.pem path, privkey.pem path. Save (Ctrl+X, Y then hit Enter).
server {
    listen 443 ssl;
    listen [::]:443 ssl;
    http2 on;

    server_name site1.caklus.com;

    ssl_certificate /etc/letsencrypt/live/site1.caklus.com/fullchain.pem;
    ssl_certificate_key /etc/letsencrypt/live/site1.caklus.com/privkey.pem;

    access_log /home/newuser/site1.caklus.com/logs/access.log;
    error_log /home/newuser/site1.caklus.com/logs/error.log;

    root /home/newuser/site1.caklus.com/public/;
    index index.php;

    location / {
        try_files $uri $uri/ /index.php?$args;
    }

    location ~ \.php$ {
        try_files $uri =404;
        fastcgi_split_path_info ^(.+\.php)(/.+)$;
        fastcgi_pass unix:/run/php/php8.3-fpm.sock;
        fastcgi_index index.php;
        include fastcgi.conf;
    }
}

server {
    listen 443 ssl;
    listen [::]:443 ssl;
    http2 on;

    server_name www.site1.caklus.com;

    ssl_certificate /etc/letsencrypt/live/site1.caklus.com/fullchain.pem;
    ssl_certificate_key /etc/letsencrypt/live/site1.caklus.com/privkey.pem;

    return 301 https://site1.caklus.com$request_uri;
}

server {
    listen 80;
    listen [::]:80;

    server_name site1.caklus.com www.site1.caklus.com;

    return 301 https://site1.caklus.com$request_uri;
}
This basic setup tells Nginx to securely serve your website (site1.caklus.com) with HTTPS, redirecting www traffic and any non-secure connections.
Nginx acts like a traffic cop, it sends PHP files to a special program for handling (PHP-FPM), while delivering other files directly.
Your Nginx config won’t use this file by default. Here’s why:
##
# Virtual Host Configs
##

include /etc/nginx/conf.d/*.conf;
include /etc/nginx/sites-enabled/*;- We’ll activate your site by creating a shortcut (symbolic link) in a special directory, keeping things organized.
- Activate your new site with a simple shortcut: ln -s /path/to/your/file /etc/nginx/sites-enabled/your_file.conf
sudo ln -s /etc/nginx/sites-available/site1.caklus.com /etc/nginx/sites-enabled/site1.caklus.com- Before restarting Nginx to activate the changes, let’s double-check everything for errors.
sudo nginx -t- Fix any errors found during the test (if any), then restart Nginx to activate your site.
sudo service nginx reloadNow that Nginx is set up, let’s build the database for your WordPress installation.
4. Make a new database for WordPress
For better security, each WordPress site on your server should have its own separate database and user. This restricts access and keeps your sites isolated.
- Let’s log in to MySQL as the root user
mysql -u root -p- Enter the MySQL root password you set up earlier.
newuser@tutorial:/etc/nginx/sites-available$ mysql -u root -p
Enter password:
Welcome to the MySQL monitor.  Commands end with ; or \g.
Your MySQL connection id is 12
Server version: 8.0.37-0ubuntu0.24.04.1 (Ubuntu)

Copyright (c) 2000, 2024, Oracle and/or its affiliates.

Oracle is a registered trademark of Oracle Corporation and/or its
affiliates. Other names may be trademarks of their respective
owners.

Type 'help;' or '\h' for help. Type '\c' to clear the current input statement.

mysql> - Now that you’re in MySQL, create your database. Replace site1_db with your desired name:
CREATE DATABASE site1_db CHARACTER SET utf8mb4 COLLATE utf8mb4_unicode_520_ci;- Create a user for your database, replace site1 with your chosen username and password with a strong password.
CREATE USER 'site1'@'localhost' IDENTIFIED BY 'password';- We want to keep things secure! Instead of giving full access, let’s give the user the specific permissions they need to work with the database.
GRANT ALL PRIVILEGES ON site1_db.* TO 'site1'@'localhost';- For tighter control, you can define exactly what this user can do in the database.
GRANT SELECT, INSERT, UPDATE, DELETE ON site1_db.* TO 'site1'@'localhost';It’s important to find a balance! While restricting access keeps things secure, some WordPress features need more permissions (like CREATE or ALTER). The WordPress Codex has a guide to choosing the right balance.
- After creating the user, we need to refresh MySQL’s internal list of permissions (flush privileges).
FLUSH PRIVILEGES;- We’re done in MySQL, so type exit; to exit
exit;Database ready! Now let’s install WordPress.
5. Let’s install the WordPress
We could download and install WordPress manually, but since we have WP-CLI, let’s use that for a quicker setup.
- Before we begin, let’s switch to the directory containing your website’s files (public directory).
cd ~/site1.caklus.com/public- Download the newest WordPress version with WP-CLI:
wp core download- WP-CLI can also create your wp-config.php file. Just provide your database details from earlier:
wp core config --dbname=site1_db --dbuser=site1 --dbpass='password'- Finally, use WP-CLI to install WordPress and create your admin user all at once:
wp core install --skip-email --url=https://site1.caklus.com --title='Site One' --admin_user=site1 [email protected] --admin_password='password'- After running the command, you’ll see a success message like this:
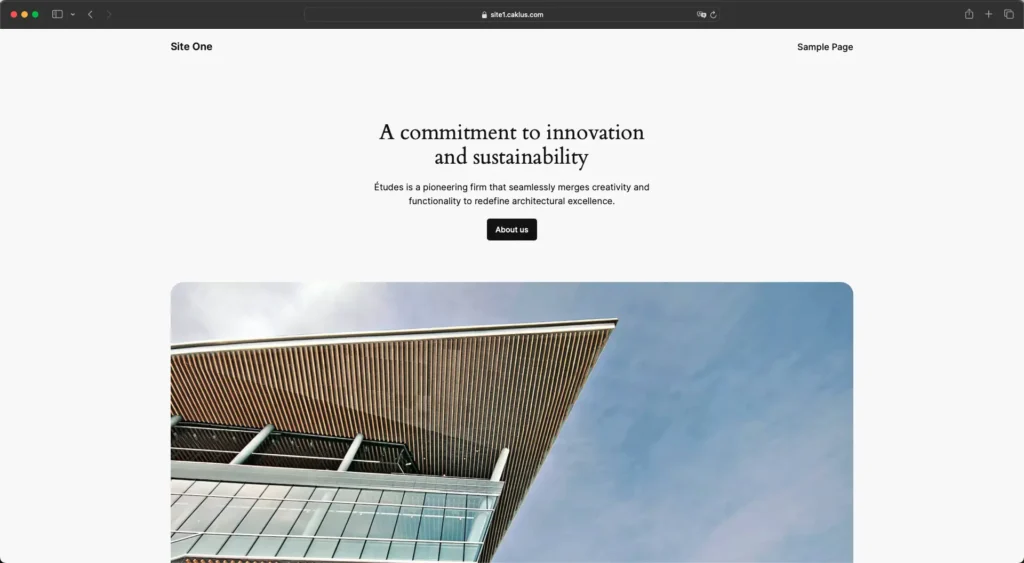
Success: WordPress installed successfully.Success! Visit your website (https://your_domain) in your browser to see your new WordPress installation.

6. Add more websites to your server
Great news! The process is just as quick and easy as the first one. Here’s a simplified rundown to get you started.
- Set up the DNS for your new website.
- Secure your new site with an SSL certificate.
- Back in your home directory, create the usual folder structure (logs and public) for your new website.
- Grab a sample server block file from Nginx’s sites-available directory and copy it. Remember to update the details (server name, root directory, etc.) for your new site.
- Create a symlink for your new site’s config file in sites-enabled and restart Nginx.
- Set up a database and user for your WordPress site.
- In the site’s public directory, use WP-CLI to download, configure, and install WordPress in one go.
Want to host more sites? Your server’s capacity (CPU, memory, disk space, and bandwidth) is the key limit. Upgrading your VPS or using caching (covered next) can help you manage this.


